Tools · Tutorial 01
CC Switch: Manage AI coding providers without breaking your setup
Install CC Switch, back up your current CLI settings, add one provider, switch safely, verify the real configuration, and understand proxy, failover, MCP, and Skills boundaries.

0 of 1 complete
Reference guide · Read when needed · View the route
Last tested and updated: August 26, 2026
CC Switch is a free, open-source desktop manager for the configuration files used by AI coding tools. Its current project describes support for Claude Code, Claude Desktop, Codex, Gemini CLI, Grok Build, OpenCode, OpenClaw, and Hermes Agent.
It is useful when you already have more than one legitimate model provider or need to keep MCP servers and Skills aligned across several clients. It is not a model subscription, an API provider, or a way to bypass a tool’s terms. A provider card is only a configuration profile until the target CLI successfully makes a request through it.
This tutorial uses one provider and one client for the first test. Your finish line is:
- your original configuration is backed up;
- CC Switch shows the intended provider as active;
- the target client starts with the expected model or endpoint;
- one small test request succeeds;
- you can restore the original login or configuration.
Know what CC Switch changes
CC Switch writes to the real configuration used by each supported client. The important locations include:
| Client | Common live files | Activation after switching |
|---|---|---|
| Claude Code | ~/.claude/settings.json | Usually reloads immediately |
| Codex | ~/.codex/auth.json and ~/.codex/config.toml | Restart the terminal/client |
| Gemini CLI | ~/.gemini/.env and ~/.gemini/settings.json | Re-read on the next request |
| OpenCode | ~/.config/opencode/opencode.json | Restart the client |
| Hermes | ~/.hermes/config.yaml and related provider data | Restart or reload the relevant Hermes surface |
CC Switch keeps its own source of truth under ~/.cc-switch/, including a SQLite database, device settings, Skills, Skill backups, and configuration backups. Switching is therefore a real local configuration change, not a visual preference.
Step 1: choose the trusted release
On August 26, 2026, the newest stable GitHub release was v3.20.0, published August 18. Always check the latest official release rather than copying that version number later.
The project warns that CC Switch is free and only distributed through:
Do not use a site or client that charges for CC Switch, asks you to top up a CC Switch balance, or requests your account password. API providers may charge separately; verify each provider independently before giving it a key or sending private code.
Current documented minimums are Windows 10 or later, macOS 12 Monterey or later, and supported modern Linux distributions. Release v3.20.0 provides Intel/Apple-silicon macOS packages, x64/ARM64 Linux packages, and x64/ARM64 Windows packages.
Step 2: install CC Switch
macOS
Homebrew is the shortest maintained route:
brew install --cask cc-switchOr download the current macOS .dmg, open it, and drag CC Switch into Applications. The project states that current macOS builds are signed and notarized.
Windows
Download the MSI matching your architecture from the official release page. Use the normal Windows.msi for x64 or the clearly labelled ARM64 MSI for Windows on Arm. The portable ZIP is useful for a temporary test, but the MSI is the normal installed route.
Linux
Download the package that matches both distribution and architecture. For a downloaded Debian or Ubuntu package:
sudo dpkg -i CC-Switch-v3.20.0-Linux-x86_64.deb
sudo apt-get install -f
Use the ARM64 filename on an ARM64 machine. AppImage builds are also available:
chmod +x CC-Switch-v3.20.0-Linux-x86_64.AppImage
./CC-Switch-v3.20.0-Linux-x86_64.AppImage
Do not copy these dated filenames after v3.20.0 stops being current. Select the matching asset from the release you inspected.
Step 3: confirm the client you want to manage
CC Switch manages configuration; it does not replace the target CLI. Confirm the client already runs before involving another layer:
claude --version
codex --version
gemini --version
Run only the command for the client you use. If the command is missing, install that client from its own official documentation first. Fixing a missing CLI and configuring a provider are separate jobs.
Launch CC Switch and verify:
- the main window opens;
- the tray or menu-bar icon appears;
- the app switcher includes the client you installed;
- Settings → About shows the version you expected.
Step 4: export before the first switch
Open Settings → Data Management → Export Configuration and save an export somewhere private. Treat it as sensitive: provider exports can contain endpoints, identifiers, and API credentials.
Record a small rollback card without copying secrets:
Date: 2026-08-26
CC Switch version: [version shown in About]
Client: [Claude Code / Codex / Gemini CLI / another supported client]
Original authentication: [official login / named provider]
Original model: [visible model name]
Export saved: [yes]
Test project: [disposable folder name]
If you already use official OAuth login, confirm you can identify the official-login profile before adding anything else. For Codex, the official authentication cache and runtime provider settings are separate; do not overwrite auth.json casually.
Step 5: add one provider
Select the target app, then click the + button. Choose App-specific Provider for this first test. A Universal Provider changes several app surfaces and is harder to diagnose when something fails.
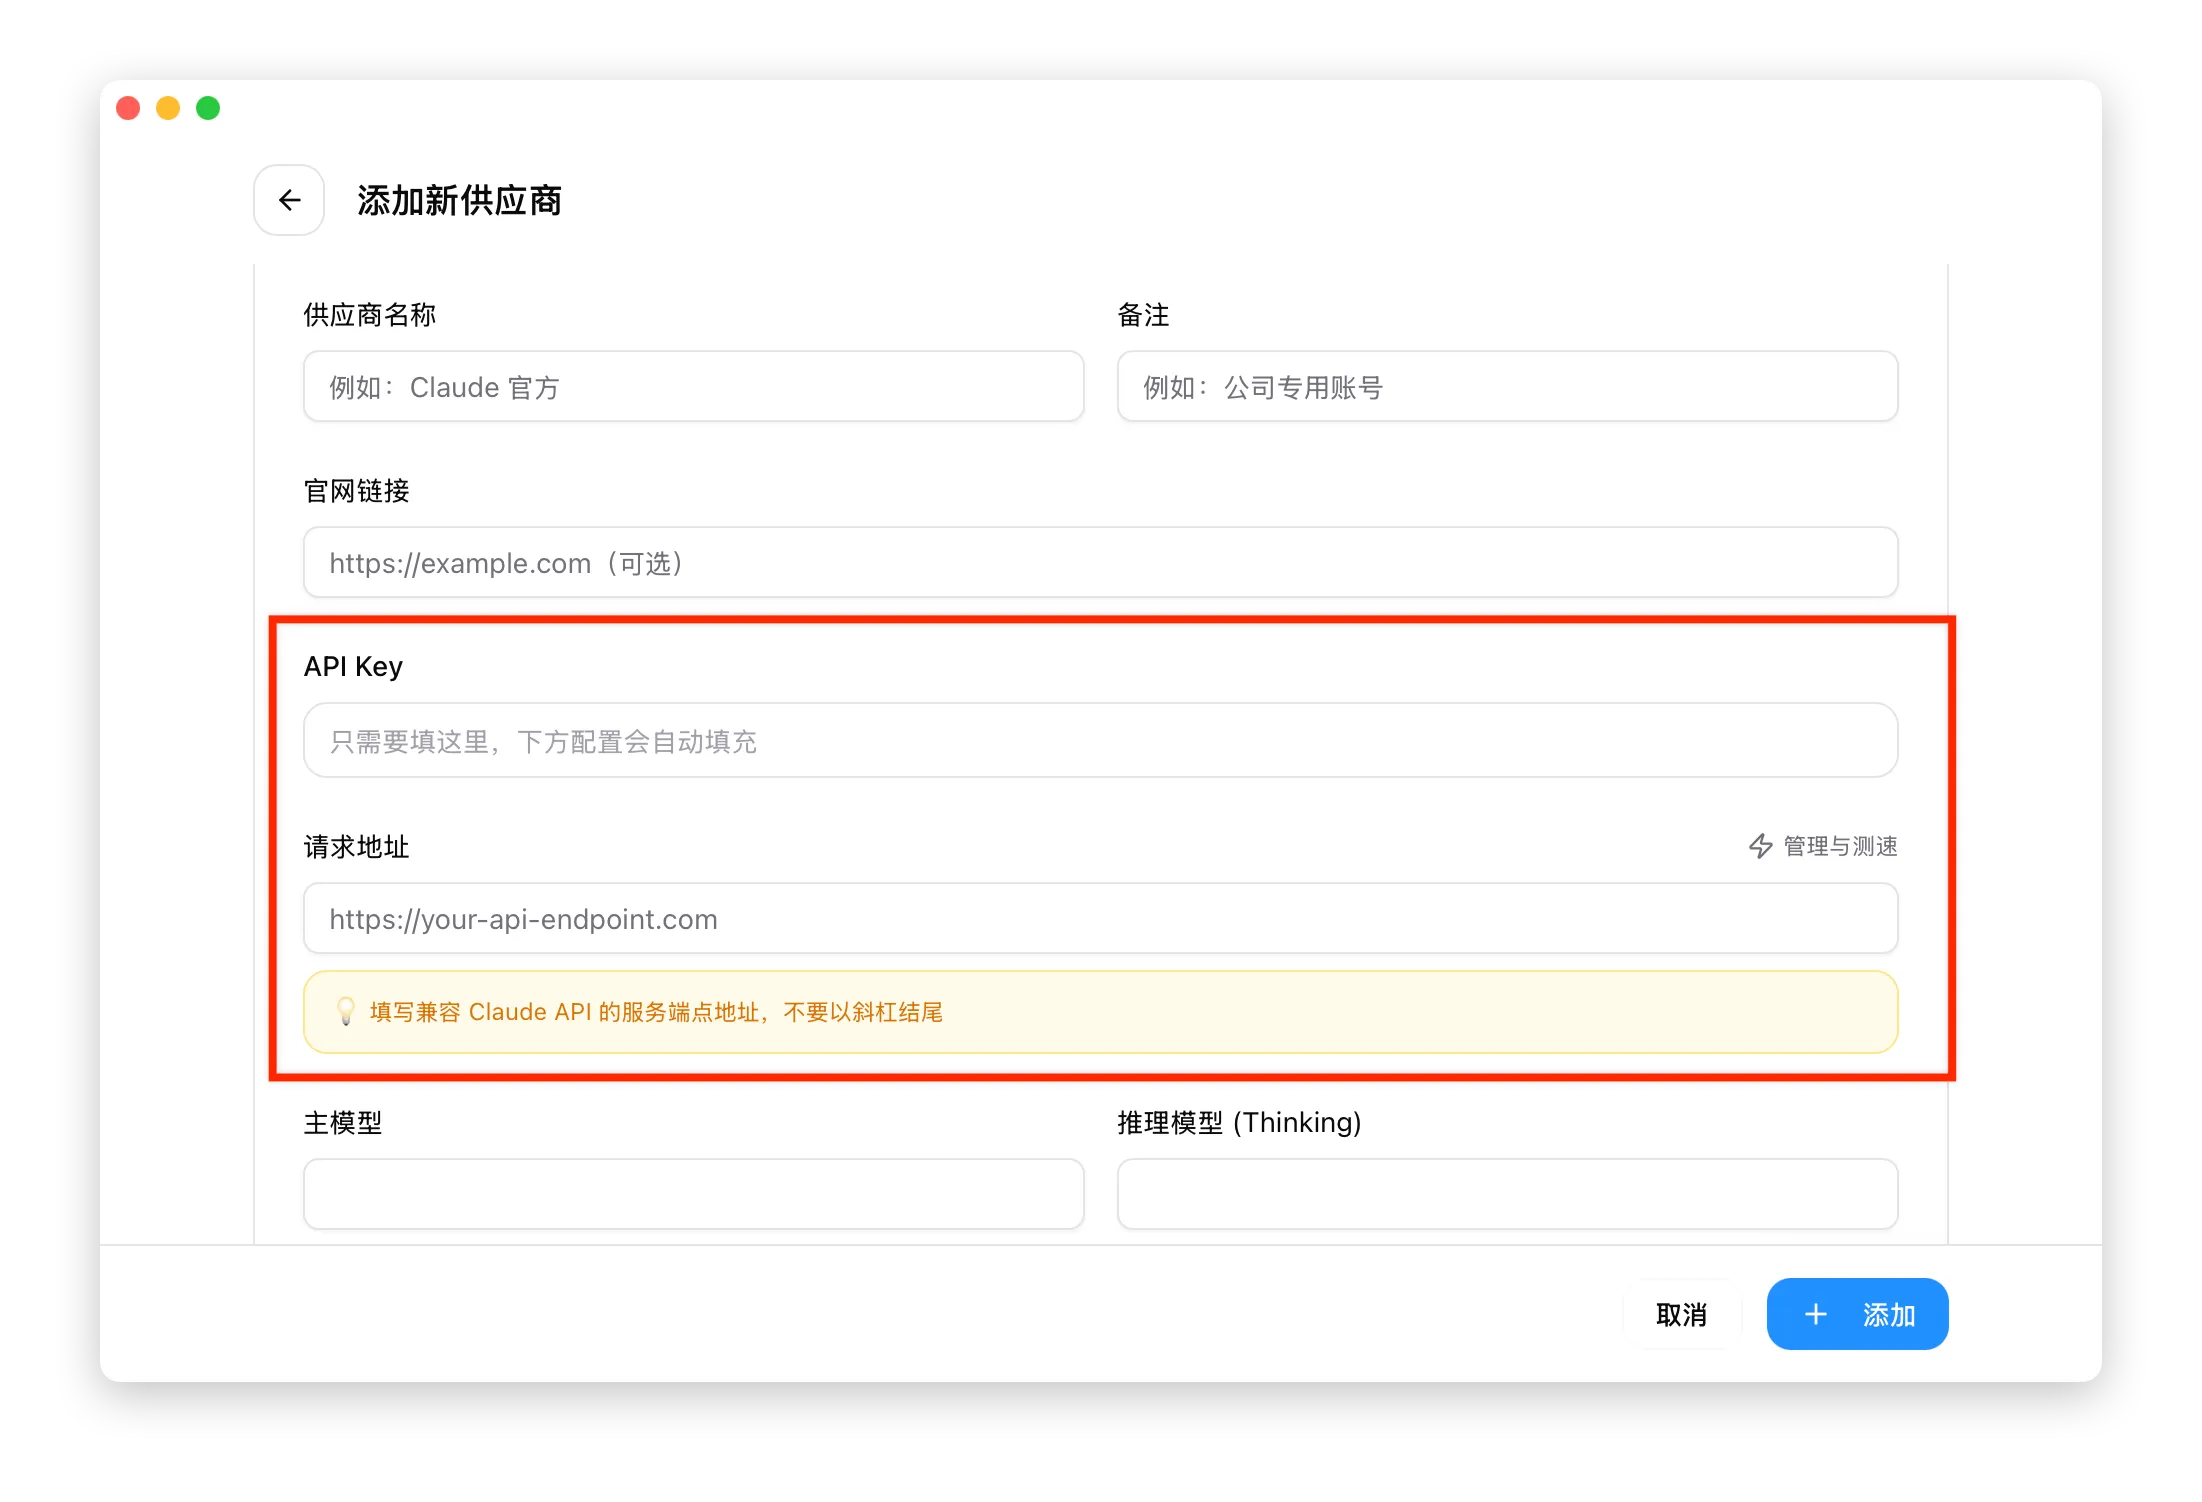
Use this order:
- Choose the provider’s official preset if it exists.
- Give the profile a name that identifies the provider and purpose.
- Confirm the endpoint against the provider’s own documentation.
- Paste the API key only into the dedicated secret field.
- Select or fetch a model the provider actually exposes.
- Add a note with the account or billing context, without including the key.
- Save the profile.
The model-fetch button calls a provider’s OpenAI-compatible /v1/models endpoint when supported. A 404 or parse error may mean the endpoint does not implement that convention; it is not permission to guess a model ID.
Provider trust checklist
Before sending real work through a non-official provider, confirm:
- who operates it and where its terms and privacy policy live;
- whether prompts, code, tool calls, and outputs are logged;
- how billing and model identity are represented;
- whether the provider is permitted for your employer or client data;
- how to revoke the key and retrieve usage records.
A preset proves only that CC Switch knows a configuration shape. It does not independently prove the provider’s security, model fidelity, solvency, or pricing claims.
Step 6: switch and inspect the real result
Click Enable on the new provider card. The active card should gain the current-state label. For Codex and OpenCode, close and reopen the terminal/client. Claude Code and Gemini CLI commonly pick up the change without a full restart, but restarting is a clean first test.
Inspect the relevant live file without printing a secret to a shared screen. For example:
sed -n '1,160p' "$HOME/.codex/config.toml"Do not print auth.json, .env, or another credential file into a recording, pasted bug report, or public terminal history. Check secret-bearing fields locally in an editor that is not being shared.
Now open a disposable project and make one bounded request:
Report the current working directory and identify the active model or provider if the client exposes it. Do not edit files, run tools, or inspect parent directories. Stop after the report.One short API request may still incur provider charges. Accept the test only when the intended client responds, the active profile remains selected, and the provider’s own usage page or CC Switch usage query shows a matching request when that evidence is available.
Step 7: prove rollback
Switch back to the original official-login or provider profile. Restart the client when its activation model requires it, then repeat the read-only test.
If the original state does not return:
- stop the client;
- use CC Switch’s import/restore control with the export you created;
- inspect the live configuration again;
- reopen the client;
- do not delete
~/.cc-switch/until the recovery is complete.
The ability to return is part of setup, not an optional disaster-recovery exercise.
Optional: local proxy, usage, and failover
CC Switch can start a local proxy, normally at http://127.0.0.1:15721, to log requests, estimate usage, translate supported API formats, and route failures to backups.
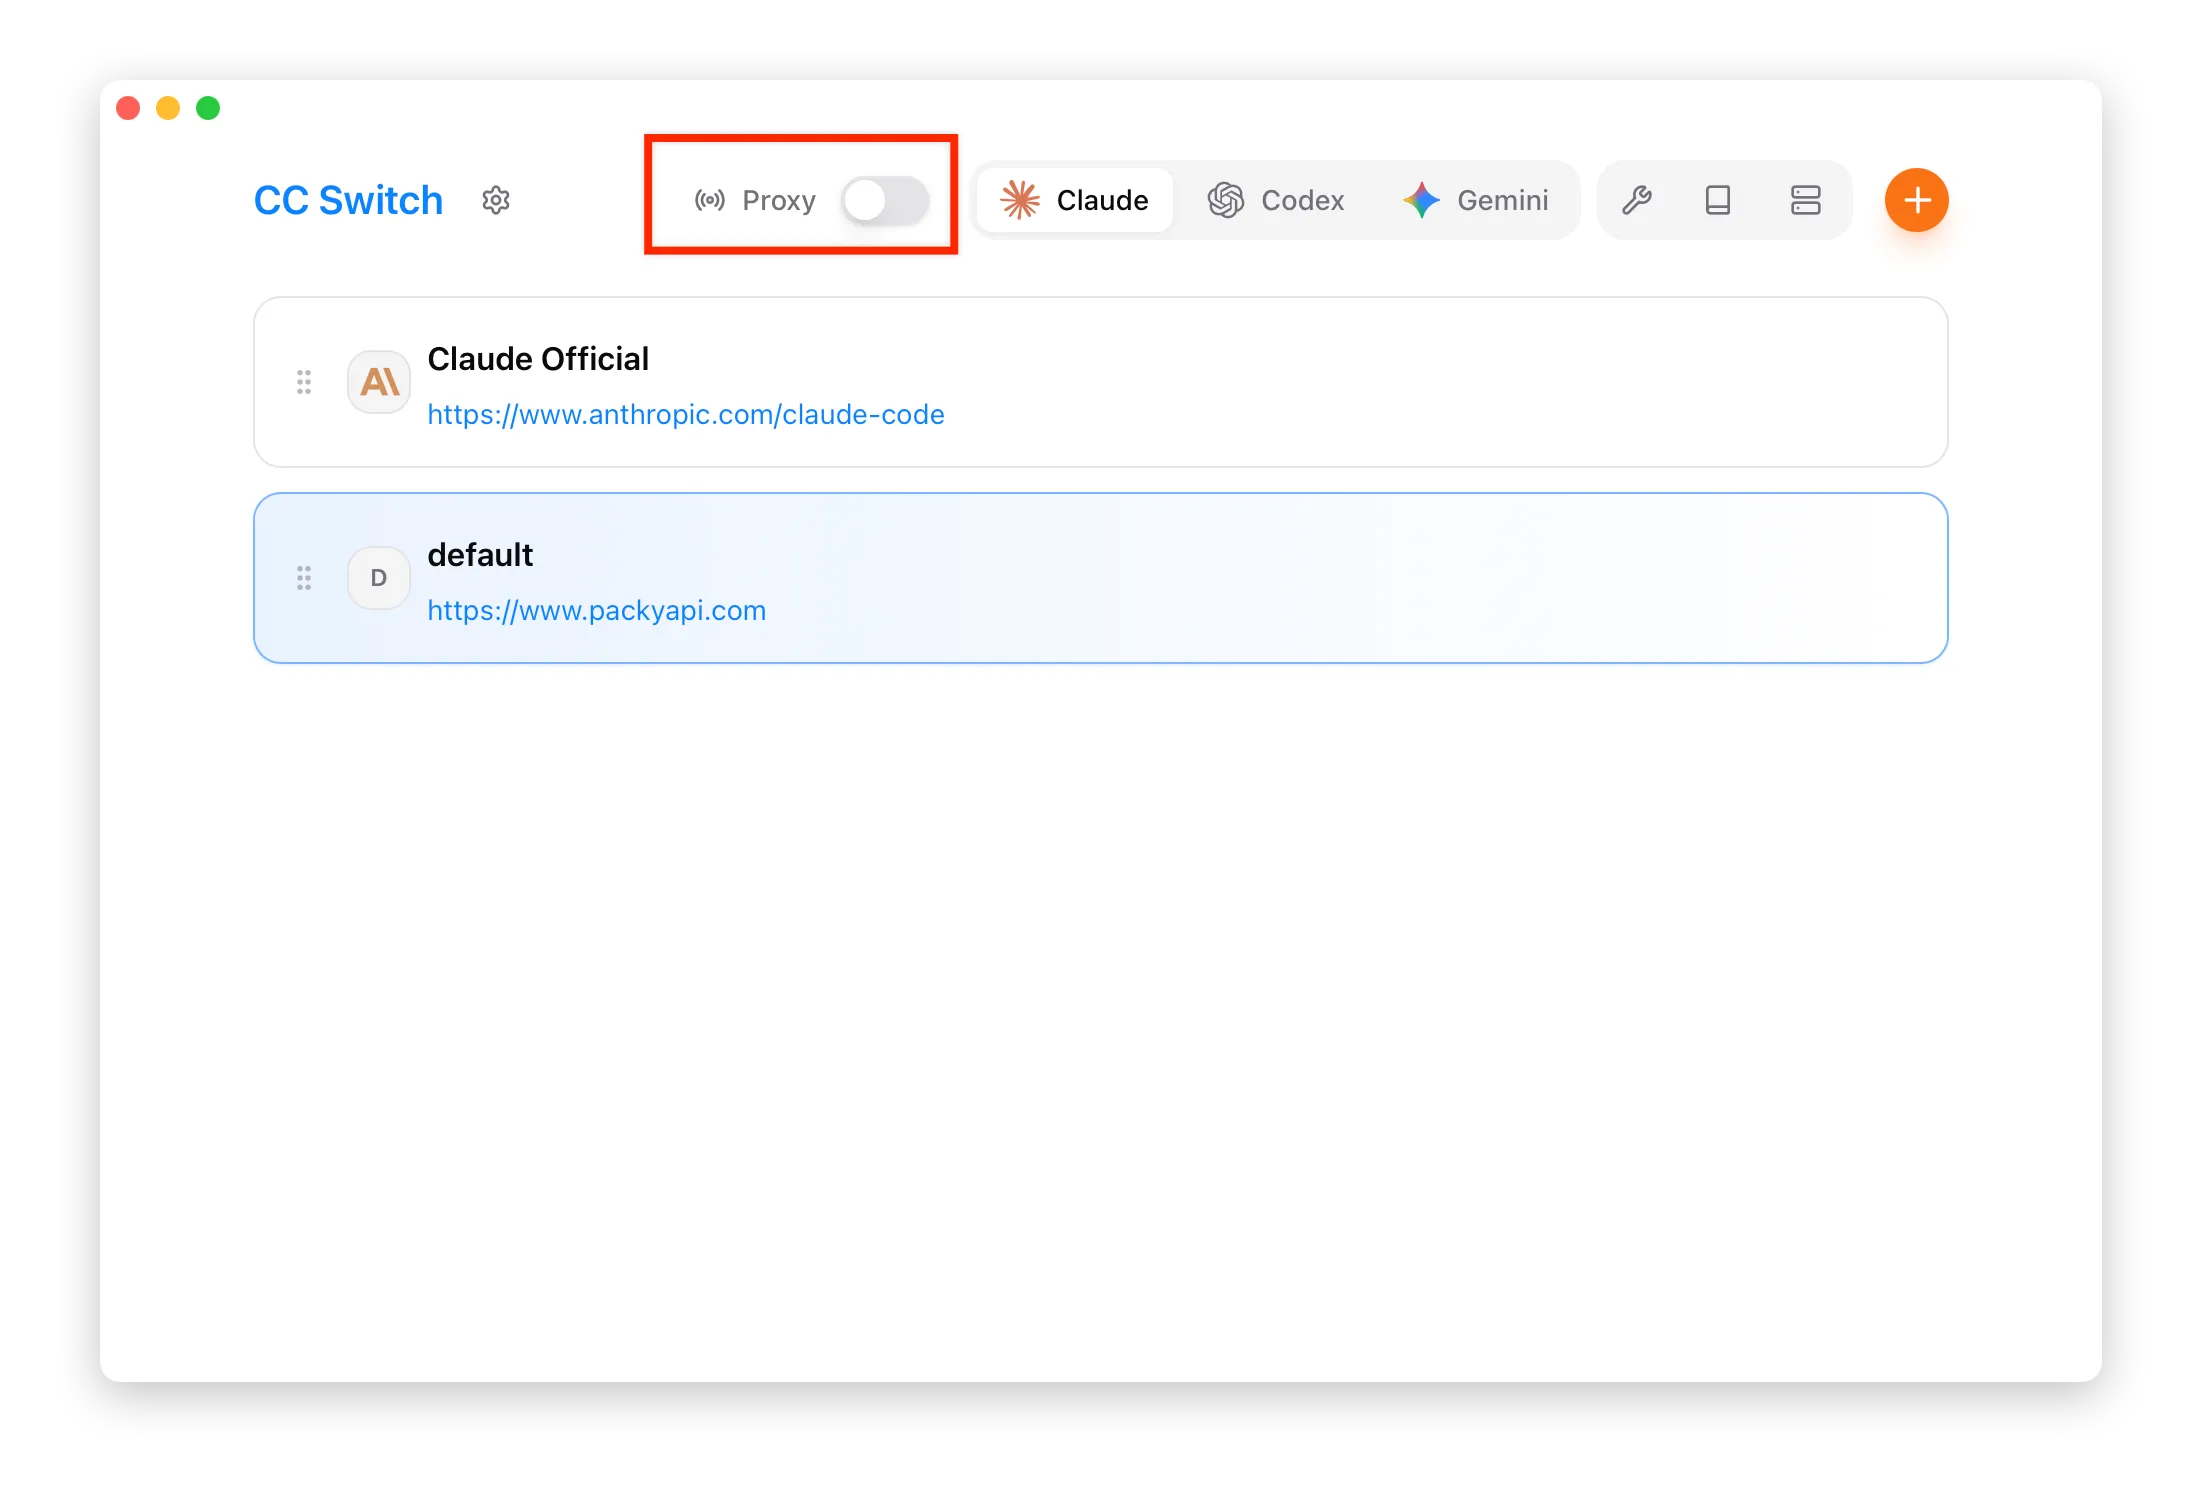
Use it only after direct switching works:
- Open Settings → Advanced → Proxy Service.
- Keep the listen address at
127.0.0.1for a single computer. - Start the proxy and enable takeover only for the client you are testing.
- Make one short request.
- Confirm the request log shows the expected app, provider, model, latency, and status.
- Stop the proxy and confirm CC Switch restores the original direct configuration.
Do not bind the proxy to 0.0.0.0 merely to make an error disappear. That can expose the listener to the local network. If you genuinely need LAN access, design authentication, firewall rules, logging, and data handling first.
Failover requires the proxy, takeover, a provider queue, and auto-failover. It may send the same task to a different company, model, region, price schedule, or retention policy. Use providers with compatible data rules, set a small test budget, and inspect failover logs before trusting it for long jobs.
Optional: synchronize MCP servers and Skills
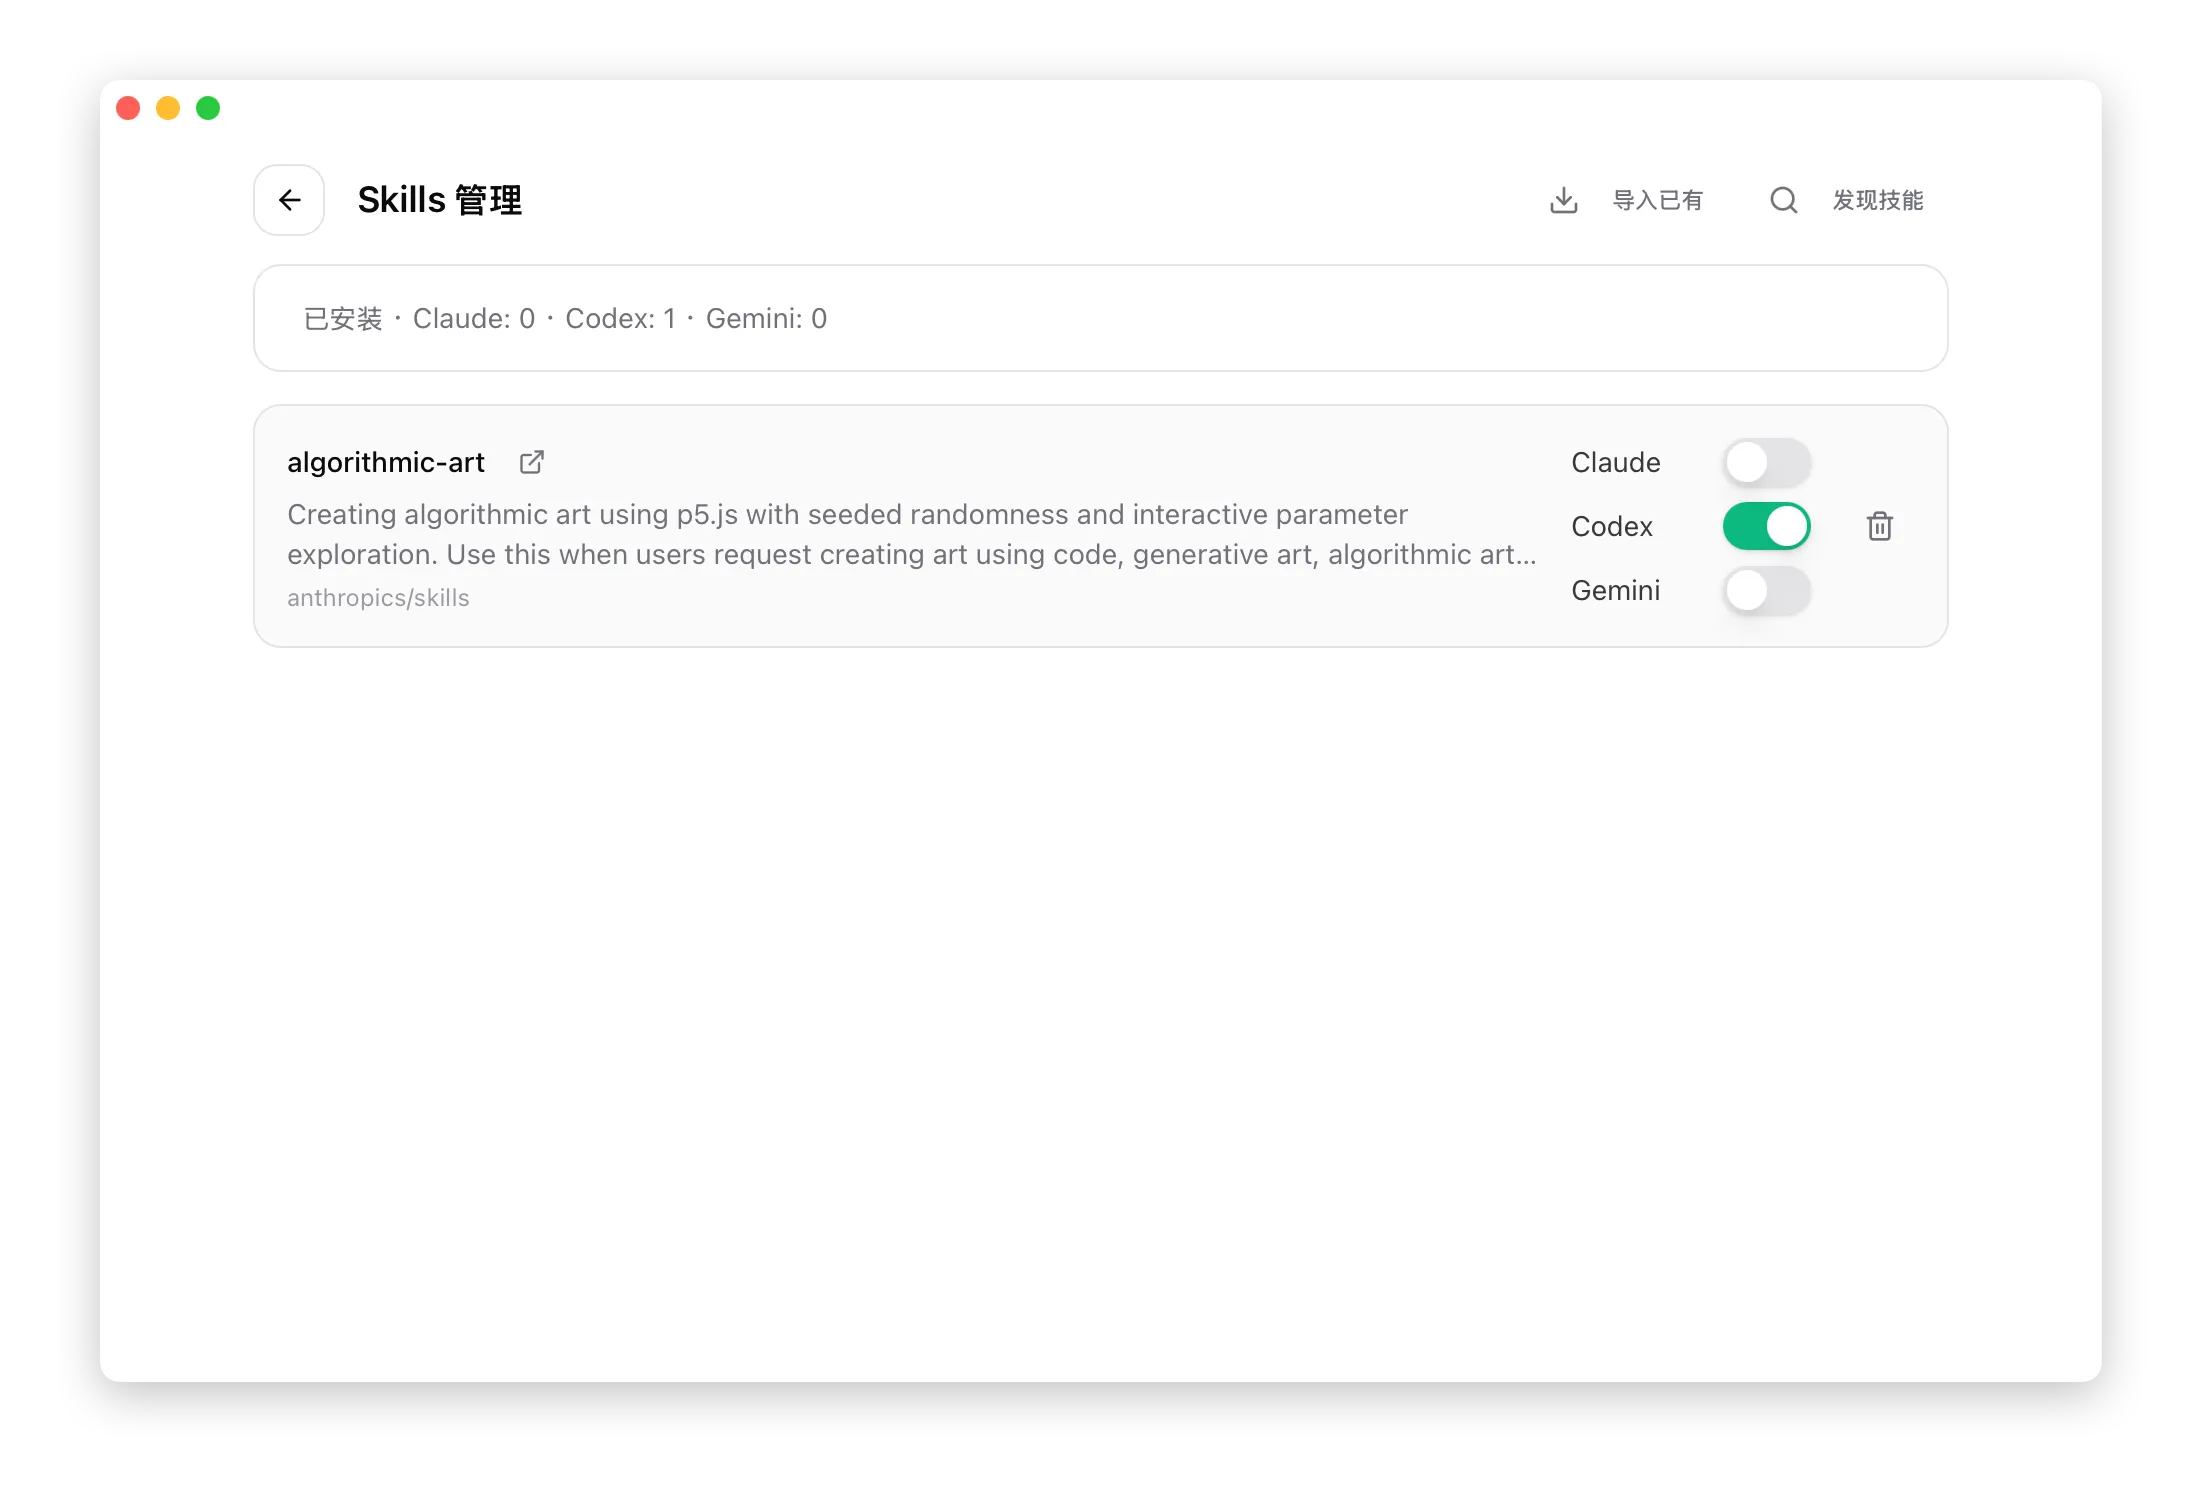
CC Switch can write MCP configuration to supported clients and maintain reusable Skills.
For MCP:
- Import an existing known-good server or add one reviewed server.
- Check its command, arguments, working directory, environment variables, and network destination.
- Enable only the one target-app toggle.
- Restart that client and verify the named server appears.
- Call one harmless read-only tool and inspect the execution record.
For Skills:
- Review the source repository and the complete Skill folder.
- Install one Skill into the target app.
- Ask the client to identify the Skill and explain when it would use it.
- Trigger a bounded test and inspect the tool/file actions.
- Use CC Switch’s backup/restore flow before removing an important Skill.
An MCP server can run commands or transmit data. A Skill can instruct an agent to take actions. Neither becomes trustworthy merely because it appears in a catalog.
Troubleshooting
| Symptom | Likely cause | Recovery |
|---|---|---|
| Client is missing from CC Switch | Its configuration directory has not been created, or the app path is custom | Launch the client once, then set its directory under CC Switch settings |
| Provider card is active but the old model remains | The client kept its running configuration | Fully close and reopen the client; Codex requires a restart after switching |
| Switch fails with a file error | The config is locked, malformed, or not writable | Close the client, validate the file format, and check directory ownership before retrying |
| Test returns 401 or 403 | Wrong key, wrong auth field, expired credential, or provider policy | Revoke exposed keys, create a correctly scoped key in the provider’s official console, and verify the expected auth method |
| Model fetch returns 404 or 405 | The provider does not expose /v1/models | Enter a documented model ID manually; do not treat the endpoint failure as an invalid key |
| Proxy reports “address already in use” | Another process owns the port | Stop that process only if you recognize it, or choose an unused local port while the proxy is stopped |
| Failover never activates | Proxy, takeover, auto-failover, or backup queue is incomplete | Check all four prerequisites and make a controlled failure test with a low budget |
| Deleted MCP entries reappear | Two configuration sources are still synchronizing | Choose one source of truth, disable the duplicate binding, and review the resulting live file |
Update or uninstall
On macOS with Homebrew:
brew upgrade --cask cc-switchCC Switch also checks for updates in Settings → About. Read release notes when an update changes provider merging, OAuth preservation, proxy takeover, session history, or Skill synchronization.
To uninstall on macOS, move the app to Trash or use Homebrew. On Windows, use Settings → Apps. On Linux, remove the package with the package manager used to install it.
Keep ~/.cc-switch/ until you have restored official client configurations and decided whether the exports, database, logs, and Skill backups are still needed. Deleting that directory is a separate data-removal decision from uninstalling the application.
FAQ
Do I need CC Switch for one official provider?
Usually not. The official client’s own login is simpler and has fewer configuration layers. CC Switch becomes useful when switching, synchronization, usage inspection, or failover is the actual problem.
Does CC Switch give me API access?
No. You still need a legitimate official login, subscription, or API credential from the selected provider.
Is a provider preset an endorsement?
No. It is a convenience template. Verify the company, endpoint, terms, privacy, billing, and model identity yourself.
Why did Codex not change immediately?
CC Switch documents that Codex needs a terminal restart after a provider switch. Close the current process and open a new one.
Can I sync my export through cloud storage?
You can, but the export may contain credentials. Use an encrypted, access-controlled location and review what is inside before uploading it anywhere.
Should I enable proxy failover on day one?
No. First prove direct switching and rollback. Add one routing layer at a time so you can identify which layer failed and where data went.
Official sources
- CC Switch official repository
- Latest official release
- English user manual
- Installation guide
- Provider switching
- Proxy service
- Configuration files and backups
What’s next
Build a lighter, permission-aware Mac workspace in T02: Vorssaint for macOS.