Decodo Web Scraping · Tutorial 03
Connect Decodo to any MCP-compatible AI agent
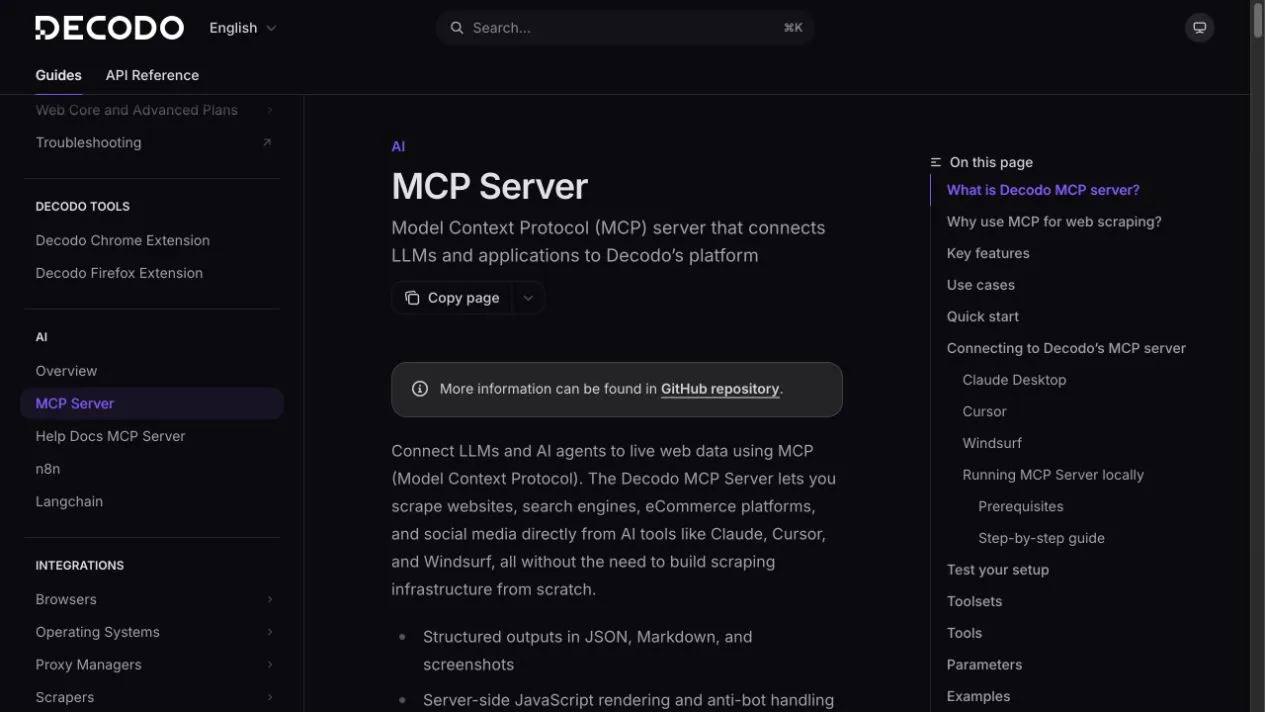
Connect Decodo to Codex, Claude Code, Cursor, Windsurf, VS Code, Hermes, or another MCP-compatible agent, then verify one harmless scrape.
0 of 5 complete
Essentials · Step 3 of 5 · View the route
Last tested and updated: August 25, 2026
MCP lets a compatible assistant discover and call Decodo tools without you writing the HTTP request by hand. Connection is not the final test. The final test is seeing a named Decodo tool run and return the expected fields.
Before you start
You need:
- A Decodo Web Scraping API account.
- Its Basic authentication token. This is not a proxy username/password and not a Bearer token.
- An MCP client such as ChatGPT desktop, Codex CLI, Claude Code, Cursor, Windsurf, Hermes, or another client that supports remote or stdio servers.
- Node.js 18 or newer if you use the local npm package.
Use Ron’s Decodo partner link if you want to support Superbash Learn. Plan details change; verify current allowance and price in your dashboard.
Step 1: copy the correct token
Open Decodo Dashboard, enter Web Scraping API, and copy the Basic authentication token from the API area.
Do not paste it into:
- a chat prompt;
- a screenshot;
- a public repository;
- a shared Skill file.
If exposed, rotate it. Deleting a committed token does not make the old token private again.
Step 2A: add the hosted MCP server
Clients that support remote MCP servers can use:
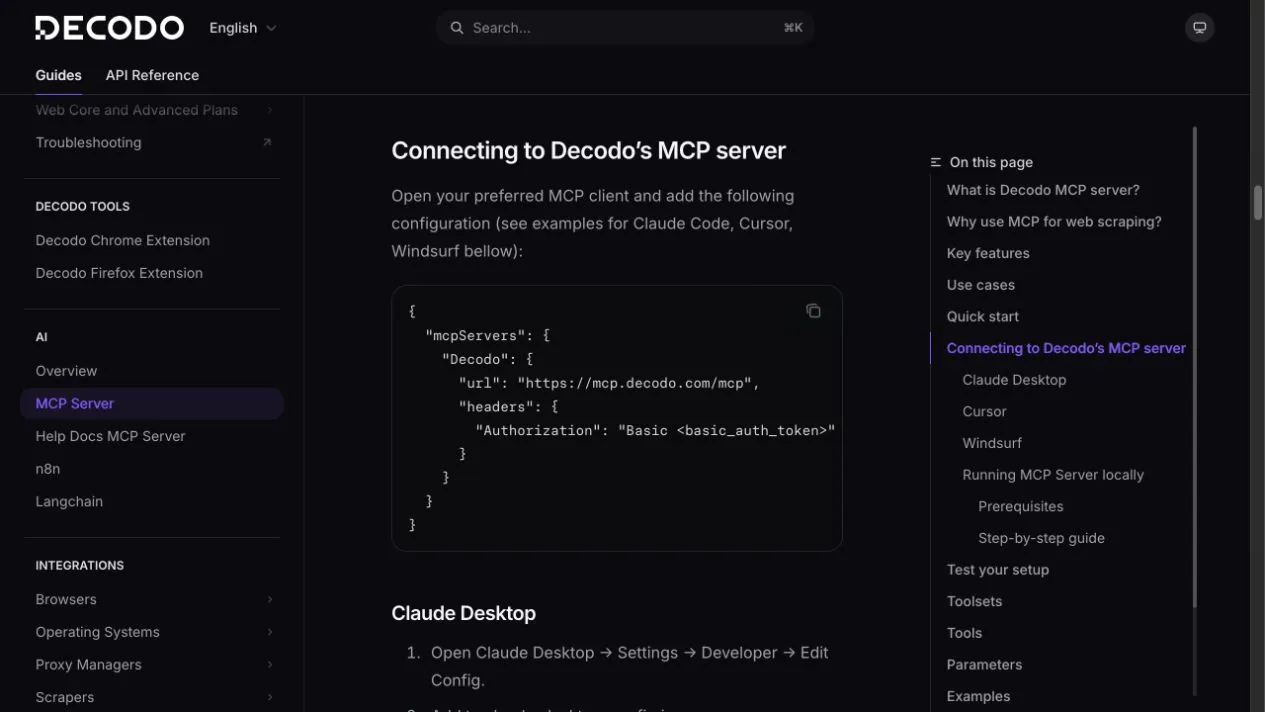
The JSON below is a reference for clients that use the common mcpServers format. Codex, VS Code, and Hermes use different configuration syntax; Step 4 gives the exact destination for each client.
{
  "mcpServers": {
    "Decodo": {
      "url": "https://mcp.decodo.com/mcp?toolsets=web,search",
      "headers": {
        "Authorization": "Basic <basic_auth_token>"
      }
    }
  }
}
Replace only <basic_auth_token>. Keep Basic and one space before the token.
Step 2B: add the local npm server
For clients that launch stdio MCP servers, use Decodo’s official package:
{
  "mcpServers": {
    "Decodo": {
      "command": "npx",
      "args": ["-y", "@decodo/mcp-server"],
      "env": {
        "SCRAPER_API_TOKEN": "<basic_auth_token>",
        "TOOLSETS": "web,search"
      }
    }
  }
}
Save the file, then restart or reload MCP in the client.
The value of SCRAPER_API_TOKEN is the raw Basic token. Do not add the word Basic inside this environment variable. The hosted HTTP route is different: its complete Authorization header must begin with Basic .
Step 3: understand the universal Decodo setup
The Decodo side of the setup is universal across MCP-compatible AI agent environments. Every client needs the same five decisions:
- Name the server
decodoso it is easy to recognize. - Choose one transport: hosted HTTP or the local stdio package. Do not configure both for the first test.
- Authenticate correctly. Local stdio receives the raw token as
SCRAPER_API_TOKEN; hosted HTTP receivesAuthorization: Basic <basic_auth_token>. - Start with
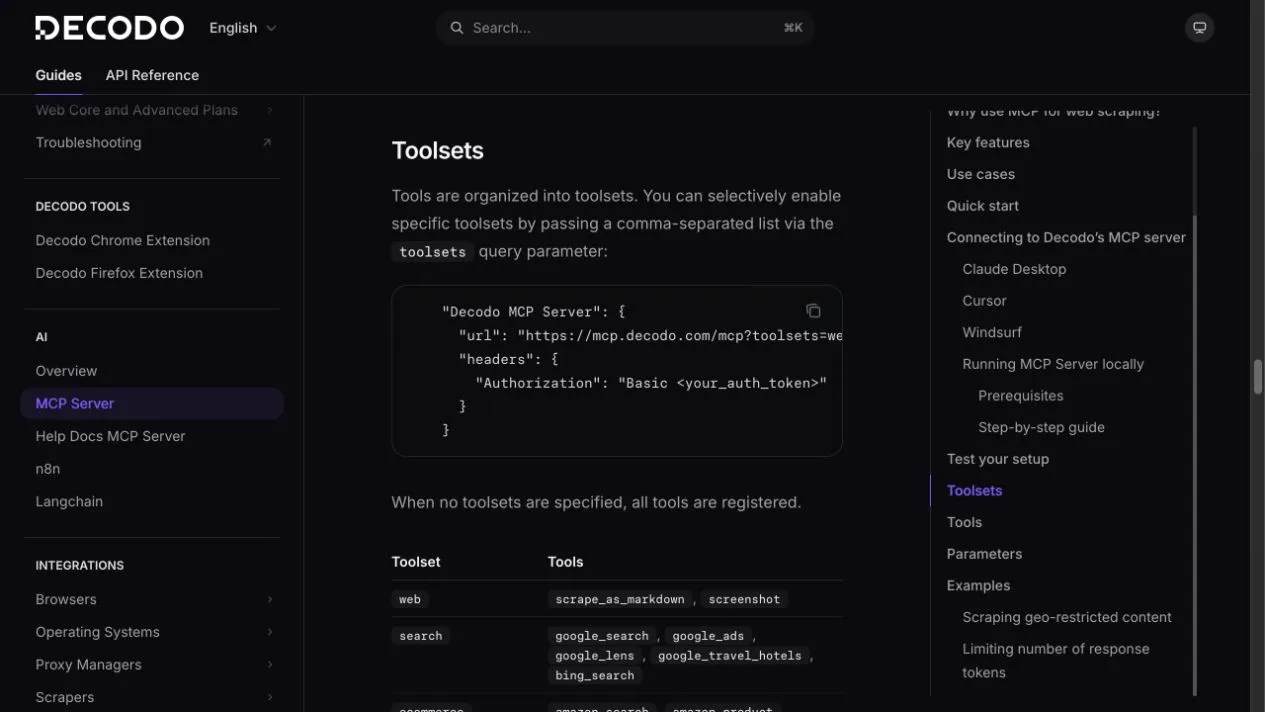
TOOLSETS=web,searchso the agent sees a focused tool catalog. - Reload the client and run the same one-request smoke test in Step 6.
Only the client wrapper changes. Each environment has its own file location, configuration dialect, secret mechanism, and status command:
| Configuration family | Clients in this lesson | Main difference |
|---|---|---|
| TOML | ChatGPT desktop, Codex CLI, Codex IDE extension | Uses [mcp_servers.decodo] in Codex configuration |
mcpServers JSON | Claude Code, Cursor, Windsurf, and many other clients | Uses a named server inside an mcpServers object |
servers JSON | VS Code | Uses a top-level servers object and can prompt securely for secrets |
| YAML | Hermes Agent | Uses mcp_servers in ~/.hermes/config.yaml |
Pick your client below and follow only that subsection.
Step 4: configure your AI agent client
Codex: ChatGPT desktop, CLI, or IDE extension
ChatGPT desktop, Codex CLI, and the Codex IDE extension share MCP configuration on the same host.
- Save
SCRAPER_API_TOKENas a user environment variable through your operating system or secret manager. - Add this block to
~/.codex/config.toml:
[mcp_servers.decodo]
command = "npx"
args = ["-y", "@decodo/mcp-server"]
env_vars = ["SCRAPER_API_TOKEN"]

[mcp_servers.decodo.env]
TOOLSETS = "web,search"- Restart ChatGPT desktop or the IDE extension so it receives the environment variable.
- Run
codex mcp listin the CLI or open/mcpin Codex. Confirm thatdecodois connected and exposes tools.
You can instead use a project-scoped .codex/config.toml in a trusted project. Avoid passing a long-lived token through codex mcp add --env; the value can remain in shell history and is written into Codex configuration.
ChatGPT web is a separate case. It does not read local Codex configuration. Web chats use remote MCP-backed tools supplied through installed plugins, so this setup does not automatically add Decodo to chatgpt.com.
Claude Code
- Save
SCRAPER_API_TOKENin your operating system environment. - Create
.mcp.jsonin the project root and add:
{
  "mcpServers": {
    "decodo": {
      "command": "npx",
      "args": ["-y", "@decodo/mcp-server"],
      "env": {
        "SCRAPER_API_TOKEN": "${SCRAPER_API_TOKEN}",
        "TOOLSETS": "web,search"
      }
    }
  }
}- Start Claude Code and approve the project server after reviewing it.
- Run
claude mcp listor open/mcpand confirm that the server connected.
Project scope is useful for a shared server definition because the token remains in each teammate’s environment. Use claude mcp add --scope user if you want a private server available across projects, but do not put the token directly in a shared command or repository.
Cursor
- Open Cursor’s MCP settings.
- Choose global configuration for a personal setup or project configuration for a team setup. The files are
~/.cursor/mcp.jsonand.cursor/mcp.json, respectively. - Add the local
mcpServersblock from Step 2B. - Keep any file containing the real token private and out of version control. If your managed Cursor environment supplies secrets, pass
SCRAPER_API_TOKENthrough that mechanism instead. - Reload MCP, open Available Tools, and confirm that the Decodo tools appear. The Cursor CLI reads the same MCP configuration as the IDE.
Windsurf or legacy Cascade
- Open the MCPs icon in Cascade, or go to Devin Settings > Cascade > MCP Servers.
- Edit the raw file at
~/.codeium/windsurf/mcp_config.json. - Add this secret-safe local configuration:
{
  "mcpServers": {
    "decodo": {
      "command": "npx",
      "args": ["-y", "@decodo/mcp-server"],
      "env": {
        "SCRAPER_API_TOKEN": "${env:SCRAPER_API_TOKEN}",
        "TOOLSETS": "web,search"
      }
    }
  }
}- Refresh MCP servers, open the Decodo server settings, and enable only the tools you intend to use.
Current Windsurf documentation is maintained under Devin Desktop. Its legacy Cascade configuration still uses the path and interpolation syntax shown above; newer Devin Local Agent tabs use Devin CLI configuration instead.
VS Code with an agent extension
- Open the Command Palette and run MCP: Open User Configuration for a private global setup, or create
.vscode/mcp.jsonfor the current workspace. - Add this configuration. VS Code prompts for the token and stores it securely instead of placing it in the file:
{
  "inputs": [
    {
      "type": "promptString",
      "id": "decodo-token",
      "description": "Decodo Web Scraping API Basic token",
      "password": true
    }
  ],
  "servers": {
    "decodo": {
      "type": "stdio",
      "command": "npx",
      "args": ["-y", "@decodo/mcp-server"],
      "env": {
        "SCRAPER_API_TOKEN": "${input:decodo-token}",
        "TOOLSETS": "web,search"
      }
    }
  }
}- Start the server and review VS Code’s trust prompt.
- Run MCP: List Servers, select
decodo, and inspect its tools or output log.
Hermes Agent
- Put the raw token in Hermes’ local secret file:
# ~/.hermes/.env
SCRAPER_API_TOKEN=PASTE_YOUR_BASIC_AUTH_TOKEN_HERE- Add this block to
~/.hermes/config.yaml:
mcp_servers:
  decodo:
    command: "npx"
    args: ["-y", "@decodo/mcp-server"]
    env:
      SCRAPER_API_TOKEN: "${SCRAPER_API_TOKEN}"
      TOOLSETS: "web,search"
enabled: true- Run
hermes mcp test decodo, thenhermes mcp list. - Start a new Hermes session or run
/reload-mcpin the current session.
For local and hosted Hermes configurations plus recommended tool choices, use the Decodo MCP + Hermes Agent companion guide.
Other JSON-based MCP clients
Open the client’s MCP configuration, identify whether it expects mcpServers or servers, and translate the Step 2 definition into that wrapper. Preserve the Decodo command or URL, token semantics, and toolsets exactly. Then use the client’s reload or server-status control to confirm that the named Decodo tools appear.
Step 5: keep the tool catalog small
Start with web,search. Add ecommerce, social_media, or ai only when the job needs them.
Step 6: run a one-request smoke test
Use a harmless public target:
Use Decodo's scrape_as_markdown tool on https://news.ycombinator.com/.
Return the first five story titles and links.
Use exactly one Decodo request. Do not fall back to another web tool.
Check three things:
- The client names
scrape_as_markdownor clearly shows the Decodo tool call. - Five linked items appear.
- The assistant did not silently use ordinary search or browser tools.
Step 7: install or write routing instructions, never credentials
A reusable Skill should hold procedure. Decodo now publishes official Agent Skills for common routing and price-monitoring workflows; the next lesson explains when and how to install them. If you write your own procedure, keep it narrow:
Use the narrowest Decodo tool for the target.
Return source URL, observed date, requested geography, and requested fields.
Leave missing values null. Do not infer price, stock, author, or date.
Stop after one failed retry. Report total Decodo calls.
Keep the token in client secrets or environment configuration.
Next: teach a coding agent when to use Decodo with Agent Skills.
Troubleshooting
401 Unauthorized
- Verify this is the Web Scraping API Basic token.
- Keep
Authorization: Basic ..., not Bearer. - Remove accidental spaces or line breaks.
- Rotate a leaked token.
No Decodo tools appear
- Restart the MCP client after saving configuration.
- For local setup, confirm
node --versionis 18+ andnpx -y @decodo/mcp-servercan launch. - Validate JSON/YAML indentation and commas.
- Test with only
webbefore adding toolsets.
Assistant uses another web tool
- Name the Decodo tool in the prompt.
- Say “do not fall back.”
- Reduce enabled toolsets.
- Stop the run if the Decodo call is not visible.