Opus 5.5 + Unreal Engine = INSANE AAA-Style Game! (Full Gameplay + Guide)

Start an AI-assisted Unreal project with one mission you can finish and replay. Give the agent a small route, a few interactions and clear completion conditions. Once that works, add the environment, artwork and menu treatment that make it feel like a particular game.
This guide uses the Superbash Cinder Gate prototype as a worked example. Opus 5.5 coordinated the build from Cursor, Blender produced geometry, Unreal Engine ran the game, and Higgsfield generated weapon artwork. The result had a playable mission, a loadout and several visible problems. Those problems are useful: they show what to test after an agent says a build is ready.
The source does not provide a downloadable project or every implementation command. The steps below combine its demonstrated workflow with explicitly identified Unreal and Higgsfield documentation. They give you a starting project and a way to direct and assess the work; reproducing the exact Cinder Gate build would also require its code, assets and configuration.
Before you start: establish a working project and tool access
You need an Unreal installation that runs on your machine, a coding agent with access to your project, and Blender if you want scripted geometry. For generated artwork through Higgsfield, use a subscribed account and connect it to your chosen agent. Keep a recoverable copy of the project before asking the agent to change it.
If you do not already have a prototype, Epic’s current First Person template is a documented starting point. In the Unreal Project Browser, choose Games and First Person. Select the variant appropriate to your installed version; the current Arena Shooter variant includes weapons, enemies and pickups. Create the project and play its starting level before adding custom systems. Epic’s first-project guide also shows the Blueprint project option and Create step.
This template route is added guidance, not a claim that Cinder Gate began from that exact template. The recorded project began with an existing fortress prototype. In either case, the first useful checkpoint is the same: the project opens, the player moves, the camera behaves sensibly, and you can stop and restart a session.
Ask the coding agent to inspect the existing project before implementing changes. Have it identify the engine version, player controller, active map, input setup and build process. It should report what it can actually run. The Higgsfield connection gives it creative tools; it does not automatically install Unreal, configure a compiler or provide a universal engine-control integration.
Use a small initial request such as:
Inspect this project and describe how it currently runs. Preserve the working movement and camera. Propose a compact first mission with one entrance, one main objective and one exit. List the files and systems you expect to change before implementing the first stage.
This is a suggested brief. Adjust it to your agent’s available tools and your project rather than assuming it can operate every installed application.
Connect Higgsfield and verify the connection separately
For the Cursor route used in the source, open Customize, then Marketplace, find Higgsfield, select Add and sign in. That sequence is documented in Higgsfield’s current integration guide, checked on October 28, 2026.
Start a new conversation and ask for your Higgsfield credit balance or recent generations. Confirm that the agent calls the connected tool and returns account data. A successful tool response confirms account access. Check the quoted generation cost before requesting a batch of artwork.
If you use Claude instead, the same guide describes Settings → Connectors → Add custom connector, with https://mcp.higgsfield.ai/mcp, followed by Higgsfield sign-in and authorization. That is an alternative connection route; the recorded build used Opus in Cursor. Choose the environment in which you can already inspect and modify the Unreal project.
Keep the tool roles explicit in the brief:
| Tool | Job in this workflow | Result you should be able to inspect |
|---|---|---|
| Coding model in Cursor | Plan and implement the project; coordinate other tools | Changed project files, a running build and a record of checks |
| Blender | Produce or adapt 3D geometry | An editable scene and exported meshes |
| Unreal Engine | Assemble the world and run its systems | A playable map with functioning objectives |
| Higgsfield | Generate visual artwork | Saved source images and their use inside the game |
The source uses Higgsfield images for finishes. Although the integration can also generate video, generated footage is not what makes this game’s movement, shooting or mission logic work. The tool walkthrough begins at 7:09.
Write the mission as observable states
The Cinder Gate direction was a modern tactical shooter on a volcanic island, with a proper menu, weapon customization and one complete first mission. That description gives an aesthetic, but the mission sequence makes the work testable: approach the geothermal station, breach the gate, clear the pump yard, start an emergency shutdown, survive the response and reach extraction.
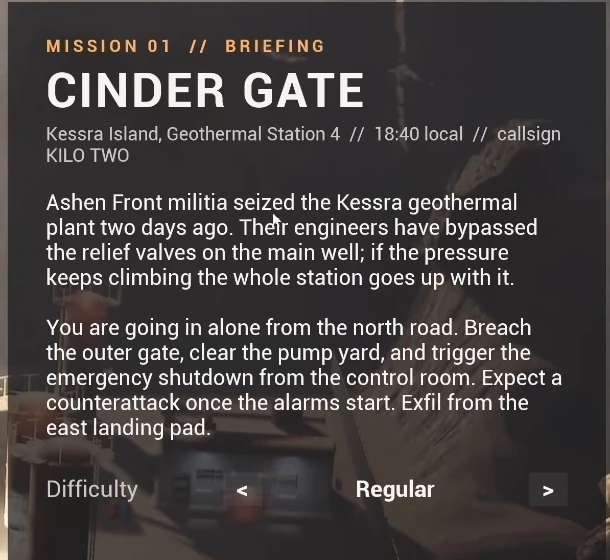
Turn your route into a table before filling the map with props. The following is an implementation brief adapted from that example, not recovered source code:
| Stage | Player action | What should change | Failure to check |
|---|---|---|---|
| Approach | Reach the entrance | The first interaction becomes available | The player gets stuck before reaching it |
| Breach | Complete the gate interaction | The route opens and the objective advances | The opening looks passable while progression still requires a charge |
| Clear | Finish the encounter | Remaining-enemy count reaches zero | An unreachable enemy prevents completion |
| Shutdown | Activate the control | The defense phase begins | The prompt appears but the game state does not change |
| Extract | Reach the exit after defense | The mission completes | The exit works too early or never works |
Implement and test the first transition before adding all the later ones. Ask the agent to make the current state visible in a debug display or log during development. Then verify the player-facing prompt agrees with it. A mission can have working code and still communicate the wrong task.
The recorded gate is a good example. Ron reaches an opening that appears passable, yet must plant the charge to move the objective forward. The repair might be to make the gate physically block the route until the action completes, or to change the objective to match the visible situation. Merely changing the instruction text without testing the scene can leave the inconsistency intact. See the gate encounter around 3:09.
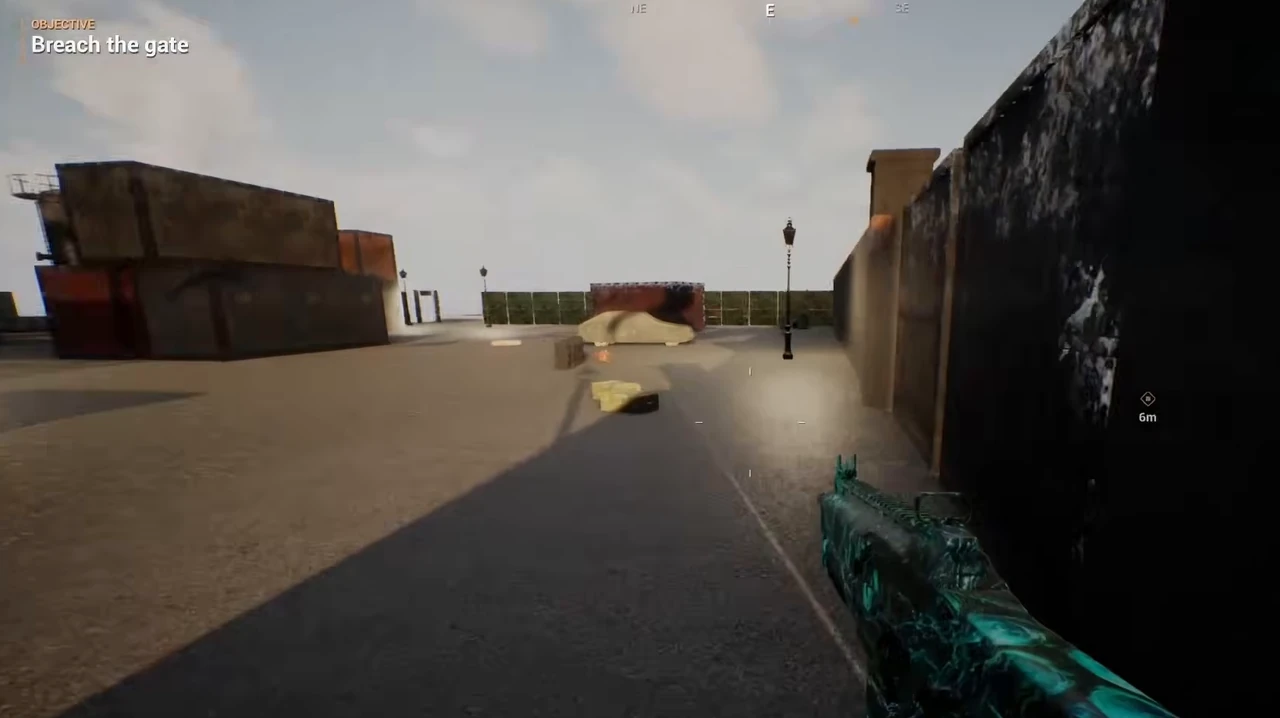
Test a restart as well as a successful transition. A fresh attempt should reset enemies, ammunition, prompts and mission state as intended. Repeat the interaction where possible and verify it does not spawn the next wave twice. These are suggested regression checks for your implementation; the source playthrough does not certify them as passed.
Build a small environment kit, then test it in Unreal
Start with the geometry that defines the route: ground, walls, a gate, cover and the control-room space. Decorative detail can wait until a player can navigate the mission. In the source, Opus wrote Blender scripts for terrain and station pieces such as gates, containers and sandbags, then exported the shapes for Unreal. It also built helmets and body armor around an existing character.
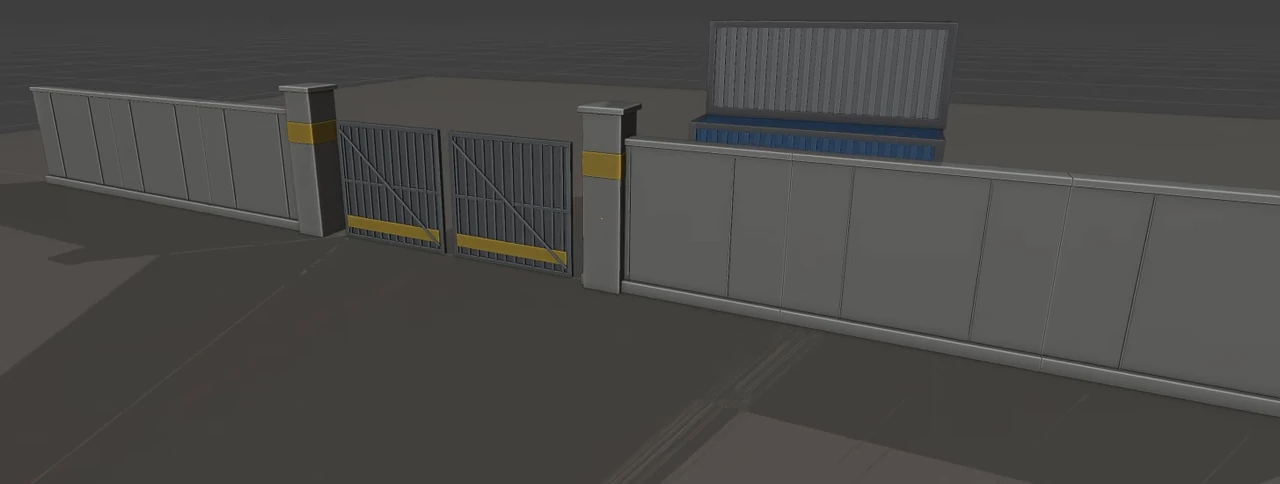
Ask for a reusable kit with clear object names and consistent dimensions. Keep a person-sized reference in the scene so a gate or container can be checked against the player. Bring one representative object into Unreal before generating dozens of variations. A scale or orientation error is much cheaper to fix at that point.
FBX is one documented route for static meshes. Epic’s static-mesh import guide covers external modeling applications and recommends inspecting the imported result in the Static Mesh Editor. It also notes that Unreal’s FBX pipeline uses FBX 2020.2, so check exporter compatibility rather than assuming every application’s defaults match.
The recording does not identify the exact export settings used for Cinder Gate. Have the agent record the settings chosen for your project and verify the imported object. Inspect scale, orientation, surface appearance and the place where it meets the ground. Then put it in the playable map and walk into, around and past it. A mesh that looks correct in an asset viewer can still have unsuitable collision or obstruct the route.
Keep an asset list as you work. The source scene combines scripted geometry with free environment assets and textures, plus existing Unreal character and rifle assets. That reuse is part of how the result was built. Preserve the original asset names and usage terms so later revisions do not turn into a search for where a model came from.
Add artwork to a material, then inspect the actual weapon
A generated picture becomes useful only when it survives the move into the game. Cinder Gate used 15 artwork designs, five for each weapon option, with tentacle, dragon, lava and neon themes. They were finishes on a shared rifle model. Count those as artwork variants when recording the asset work.
Start with one finish. Describe the artwork’s purpose and the visible features you want to retain on the surface. For example, an adapted brief could ask for edge-to-edge teal tentacle artwork, without a pictured gun, border or lettering. Save the result and its prompt before importing it. The source used GPT Image 2.5 through Higgsfield; select a model your account actually offers rather than treating the historical choice as a requirement.
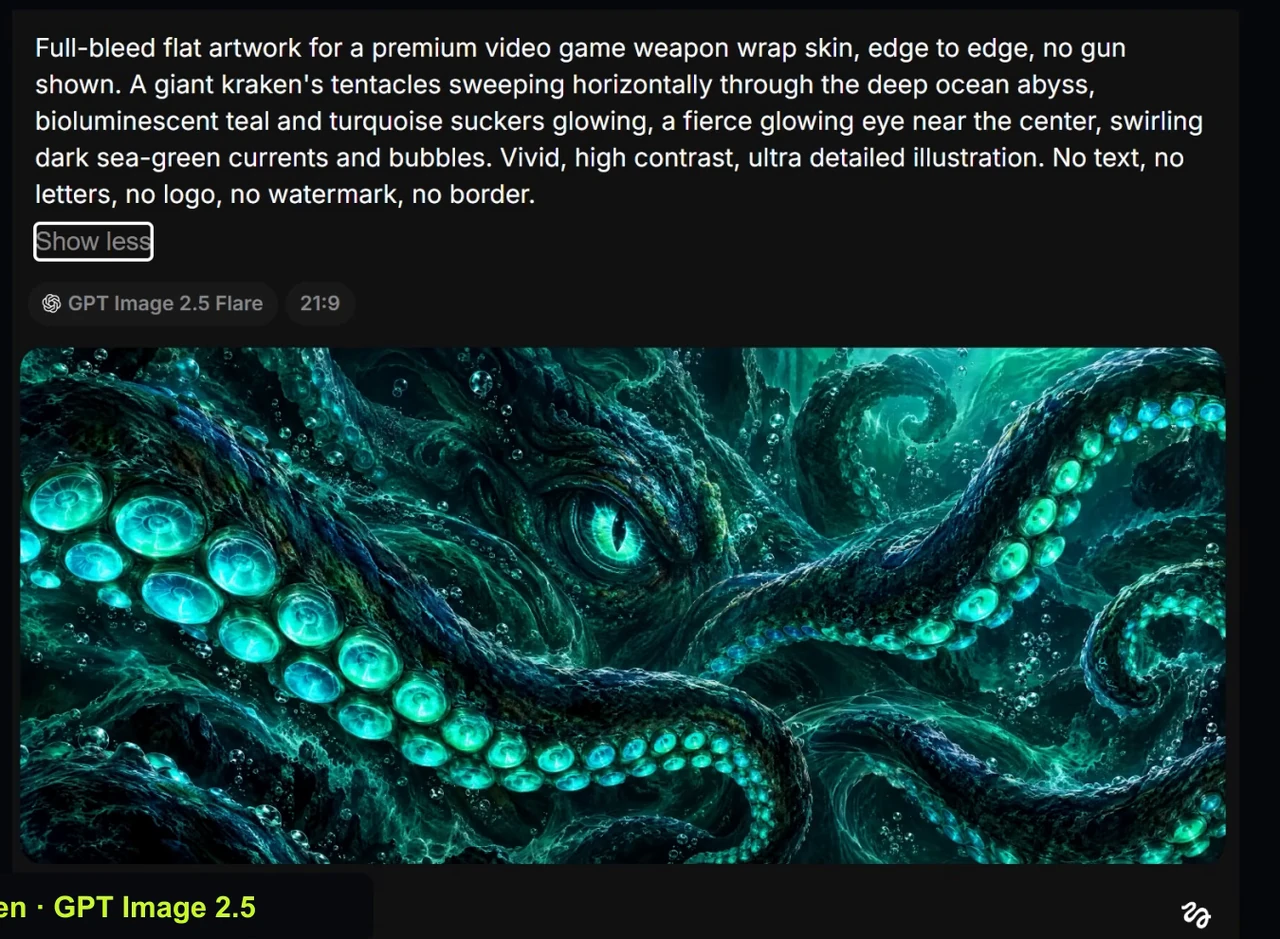
To import your image, use Import in Unreal’s Content Browser or drag the file into it. Epic’s texture documentation describes both routes and explains how textures supply material inputs such as Base Color. Importing creates a texture asset; it does not automatically choose the correct weapon surface or unwrap the image around it.
For an existing weapon material, inspect its texture and material slots before changing them. A useful setup is a parent material with exposed parameters and a separate instance for each finish. In Epic’s material-instance workflow, right-click the prepared parent material in the Content Browser and choose Create Material Instance. Open the instance, enable the parameter you want to override and change its value. The parent must expose the relevant parameter first; an arbitrary imported material may not already have a replaceable artwork input.
Ask the agent to identify that mapping and use the new instance for the intended surface. Preserve the base material so a failed experiment is easy to undo. Inspect the result from several angles, including the player’s first-person view. Look for stretching, abrupt seams, unreadable lettering, overly bright areas and changes to parts that were meant to remain plain.
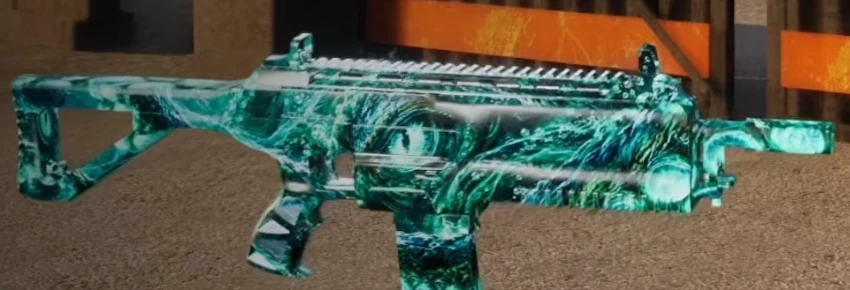
Abyssal Kraken makes this chain visible in the source: teal tentacle artwork appears on the rifle in the loadout and carries into gameplay. Follow the artwork discussion from 9:29. Your check should also cross that boundary. Select the finish in the menu, start the mission, change weapons if supported, and restart. If the selection disappears, investigate how the chosen material or skin identifier reaches the spawned weapon.
A picture of glowing tentacles is still just color information unless the material uses it for another purpose. Decide separately whether you want actual emissive behavior, metallic response or roughness changes. Judge the weapon under gameplay lighting, where a finish that looks impressive in a preview may obscure its shape or aim.
Play the mission before trusting the completion report
A coding agent can inspect screenshots and run tests, but a playtest exposes problems in sequence. Begin from the menu, select a loadout, enter the mission and follow the route without using developer shortcuts. Record where you die, lose the objective, run out of ammunition or misunderstand an interaction.
The source menu uses a live view of the level, so the loadout belongs visually to the setting you enter. It offers two automatic weapons and one semi-automatic option, optics and other attachments, plus graphics, audio and gameplay settings and a credits screen. Their presence establishes that a menu exists. It does not establish that every setting works. Test the options you plan to ship, compare the menu view with the deployed scene, and check whether selections persist into gameplay and after restarting.
Use more than one loadout. Ron preferred the high-damage semi-automatic option and struggled with the automatic weapon. Treat that observation as a reason to test the weapon choices more carefully. For your own build, repeat the same encounter with each weapon and note why a choice feels worse: accuracy, recoil, visibility, ammunition use or enemy placement. Change a specific variable, then replay the same section.
The opening encounter repeatedly exposed the player with little cover. Later, the pump yard offered walls and movement options; the player eventually cleared it and triggered the shutdown. The shown attempt ended during the control-room defense, so it does not prove that the complete extraction route was successfully played. Test the final stage yourself before calling your mission complete.
Enemy behavior also needs motion review. The agent’s intended behaviors included advancing, finding cover and flanking. The playthrough showed enemies approaching, but also awkward movement and a gliding character. A screenshot can confirm that an enemy is present; a recorded encounter is better evidence for whether navigation and animation work together.
Troubleshoot the failures with small, replayable fixes
Keep each bug report concrete enough to reproduce. Name the map location, mission stage, weapon and action, then describe the expected and actual result. Include a short recording when the issue involves movement or sound. This gives the agent something narrower to investigate than “make the game feel better.”
| Symptom | First thing to inspect | Recheck after the change |
|---|---|---|
| The opening kills the player before a meaningful choice | Spawn position, sight lines, nearby cover and encounter timing | Replay the opening on the intended difficulty |
| The player runs out of ammunition | Encounter demand and accessible resupply | Complete the route without a developer refill |
| A gate looks open but the objective stays blocked | Physical gate state versus progression condition | Try approaching and interacting from both sides |
| Enemies glide | Movement speed versus animation state, including turns and stops | Record the same encounter in motion |
| Muzzle flashes hide the target | Effect brightness, duration and placement | Compare visibility during repeated firing |
| A selected finish disappears | Loadout state and material assignment on the gameplay weapon | Deploy, switch and restart |
| A suppressor sounds wrong | The sound asset and the event that triggers it | Compare the intended attachment states with sound on |
These are diagnostic starting points, not confirmed root causes for every observed flaw. The source team responded to an earlier ammunition shortage by adding supply points and enemy ammo drops. It reduced overly bright enemy muzzle flashes. Those changes came from specific playtest feedback. See the revision discussion at 10:13.
The bell-like suppressor sound remained placeholder audio. Put placeholders in an explicit list so a successful build cannot quietly promote them to finished assets. Keep the next revision focused: fix the selected issue, rerun the relevant checks and replay the surrounding encounter to catch side effects.
Decide what the next build must prove
Before extending the map, require a repeatable run through the current mission, a working restart, correct loadout persistence and understandable objectives. Keep any failures in the handoff alongside the build. A useful report tells you what changed, what was checked, which route was played and what still needs attention.
Ron reported roughly half a day for Cinder Gate and compared it with a faster earlier game project. The scope and inputs were different, so that is the duration of this run, not a completion estimate for your game. Likewise, the argument that tool access can save model effort was not accompanied by a controlled token-cost comparison. The timing discussion begins at 10:51.
The “AAA-style” ambition describes the visual direction. A polished commercial game requires much more than this compact prototype demonstrates. Use the example for what you can inspect: code and assets brought together into a playable route, generated artwork carried into the running game, and concrete feedback used to revise it. Save that working version before you ask for the next mission.